Physically Plausible, Simplified Water Shading
Many water shaders I have come across are an ad-hoc combination of many tweakable parameters. I have attempted to create a water shader that depends on less inputs, and is also physically based for consistency under different lighting and environment conditions, while also allowing for plenty of artistic control.
Water shading can be approached as a layered combination of a regular transparent PBR material, and a thick volume of participating media, rendered with volumetric techniques.
To get started, you will need some water geometry. I use a Compute Shader driven FFT Ocean simulation, which I may cover in another post, but these techniques will work with any water surface, even a flat plane with scrolling normal maps.
We can start with a simple PBR shader with a blue albedo, and a high smoothness value.
surface.Albedo = _Albedo.rgb;
surface.Smoothness = 1;
 It begins to resemble water, however this is mostly due to the geometry and reflections. The surface itself looks like a hard, shiny material. There is no translucency, scattering or color variation, which are key visual indicators of real water. The edge are also very hard and unnatural.
The next step could be to enable alpha blending and give the water an opacity value. However, this needs to depend on the distance of the underlying terrain, otherwise all water will appear uniformly transparent.
To do this, you sample the scene depth buffer, and compute the distance between the water surface, and underwater surface. To determine opacity based on distance, we can use the Beer-Lambert Law, which is widely used in volumetric rendering, and is also the same formula for exponential fog.
// Sample depth buffer, convert into linear view distance
float backgroundDepth = LinearEyeDepth(_CameraDepthTexture.Sample(_LinearClampSampler, screenPos), _ZBufferParams);

// Distance from camera to current pixel, conveniently available in the clip-space position W component
float waterSurfaceDepth = input.positionCS.w;
float underwaterDepth = backgroundDepth - waterSurfaceDepth;
surface.Alpha = 1 - exp(-underwaterDepth * _Albedo.a);
There is now depth-based transparency. However it looks like fog instead of water, this is because the color of the underwater terrain is not modified, only it’s visibility. Water absorption is wavelength dependent, which means we can not rely on alpha-blending to do it for us, as we need separate control over red, green and blue channels.
Instead of using alpha-blending, we need a copy of the camera target texture, which we can then sample from, and tint it’s color before applying transparency. We also need an RGB value to control the underwater tint. Lets call this “_Extinction”. You can think of it as opacity, but colored, instead of greyscale, and dependent on depth. Each RGB component controls how quickly that color will be attenuated. Water absorbs red light quickly, but green and blue are absorbed over a larger distance. So your Extinction should be a reddish-brown color.
As before, we should use Beer-Lambert to increase the strength of the tint with depth. We must also handle transparency ourselves, as we are no longer using hardware blending. To blend between the background and water color, add them together. However, this needs to be done after lighting is calculated, as we don’t want to affect the background color with the water surface’s lighting.
We also need to modify the Albedo to increase, as the background visibility decreases. with depth, so that shallow water remains clear. This can be done using the inverse of the tint applied to the background.
// Sample camera texture
float3 background = _CameraOpaqueTexture.Sample(_LinearClampSampler, refractionUv).rgb;

// Tint according to extinction, using beer-lambert
float3 transmittance = exp(-underwaterDepth * _Extinction.rgb);;
background *= transmittance;

// Increase Albedo as water gets deeper
surface.Albedo = _Albedo * (1 - transmittance);
surface.Smoothness = 1;
surface.Alpha = 1; // Set alpha to 1, as we're not using it for blending

// Apply lighting (Disney Diffuse + GGX Specular in this case)
float3 color = ApplyLighting(surface, input.positionWS);

// Combine with the tinted underwater surface
color += background;
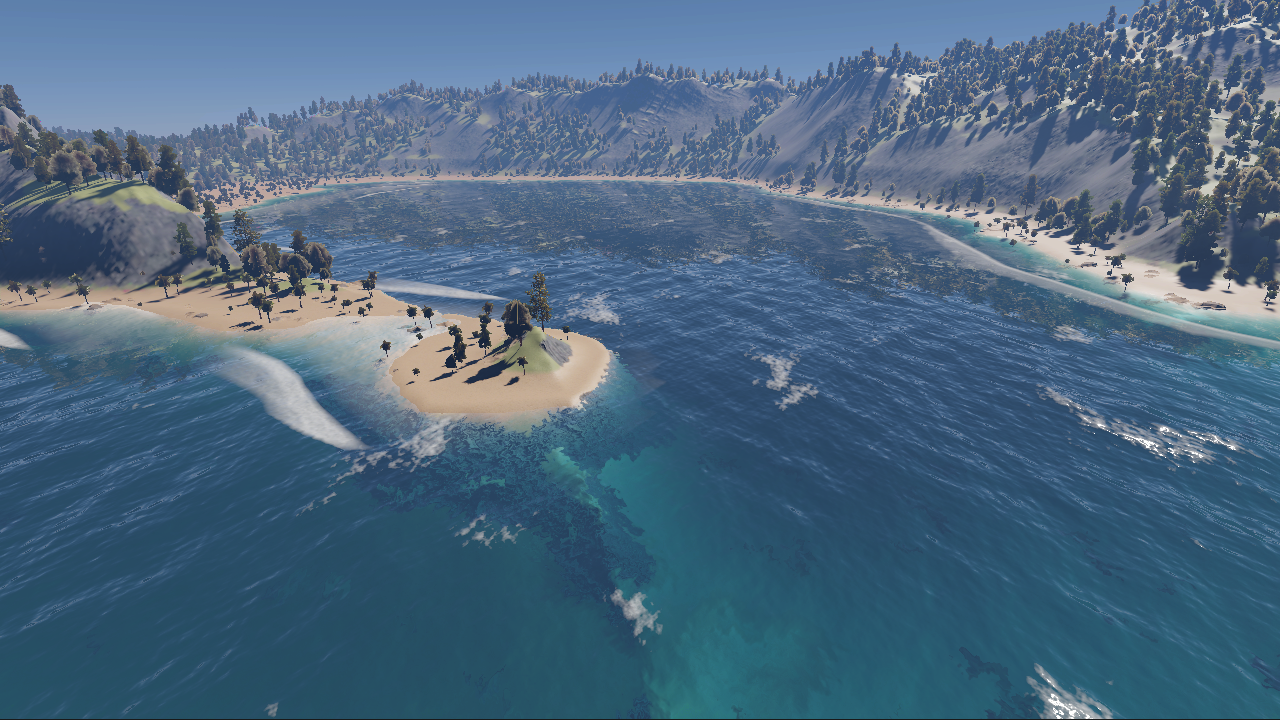
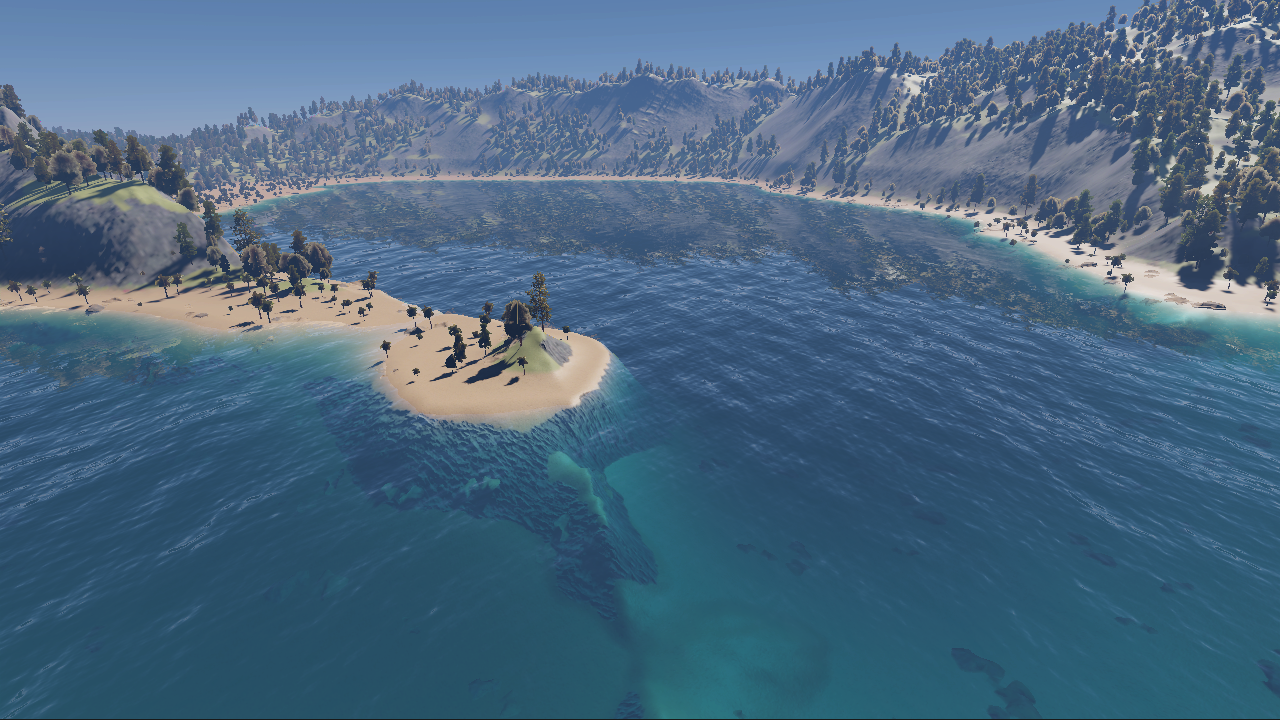 The underwater surface now has a depth-dependent tint, and smoothly transitions to a pure blue color as depth increases. Shallow water can still remain clear, and specular highlights are retained throughout.
This range of colors is obtained with only two color inputs, albedo and extinction. Extinction is a combination of two physical material properties, scatter and absorption. Albedo is defined as scatter divided by extinction. It is possible to convert physically-measured scattering and absorption values into albedo and extinction, and vice-versa. These inputs can be modified to produce different colored liquids as well.
The translucency is behaving nicely, however the water surface looks quite bumpy. This is because the diffuse component still depends on the surface normal, but as water is highly translucent, the surface normal has virtually no effect on the diffuse shading. The color comes from scattering events deep inside of the water, where light is scattered in all directions.
Instead of calculating the diffuse component using a regular lambert or disney-diffuse function, common to most pipelines, we need to take a volumetric rendering approach. One approach would be to raymarch into the water volume, taking multiple samples, and calculating the amount of light scattering into the camera at each sample.
This is the approach used for most atmospheric scattering and volumetric rendering equations, as the scattering and absorption components are often spatially varying in these situations. However it is quite costly, and for realistic results, multiple scattering is also required which is quite complicated and expensive to calculate, usually requiring complex precomputations and large lookup tables.
However, we can treat water as a homogenous medium and assume that all particles have the same lighting characteristics. This greatly simplifies things and lets us control everything with the same simple parameters as before.
We can assume that the water is a flat, infinite plane, pointing upwards. This means the amount of light entering the water at any point will be constant, depending only on the directional light’s orientation, as well as it’s color. Ambient light also needs to be factored in.
// Set Albedo to black, as we want to calculate diffuse lighting separately
 surface.Albedo = 0;
 surface.Smoothness = 1;
 surface.Alpha = 1;

 // Apply lighting (GGX Specular only, diffuse will be ignored as Albedo is 0)
 float3 color = GetLighting(surface, input.positionWS);

 // Calculate diffuse lighting, assuming the normal is world-up
 float3 ambient = AmbientLight(float3(0, 1, 0), input.positionWS);
 float3 scattering = _Albedo * (ambient + light.Color * saturate(light.Direction.y));
 color += scattering;

 // Combine with the tinted underwater surface
 color += background;
 return float4(color, 1);
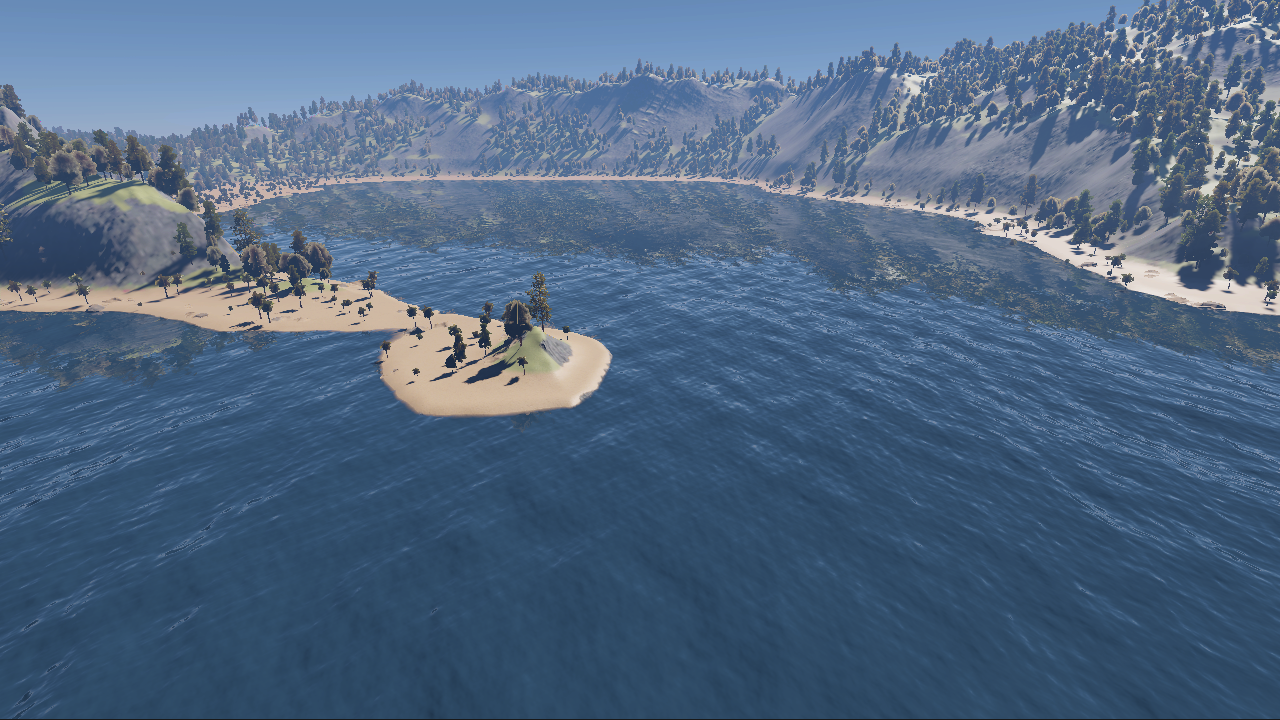
The diffuse lighting now looks smooth, and the surface itself appears more translucent now. This also keeps lighting more stable in different conditions and times of day.
We’re still missing distortions caused by refraction. This can be easily be implemented by offsetting the background texture fetch, based on the surface normal. Don’t forget to also offset the depth texture fetch by the same amount, or the color tint won’t line up with the distance of the underlying surface. You’ll also want to reduce the refraction intensity as the water gets far away, or distant water will appear very distorted.
Due to the UV offset, it’s possible to sample a pixel that is above water, which will look incorrect and cause some equations to have extreme values. This is easy to detect, and can be corrected by sampling the depth texture again, but with the unmodified UV.
// Calculate refraction offset
 float2 uvOffset = normal.xz * _RefractOffset;

 // Reduce offset as pixel distance increases
 uvOffset *= 1 - saturate(input.positionCS.w * _RefractionFade);
 float2 refractionUv = screenPos + uvOffset;

 // Sample depth buffer with offset UV
 float backgroundDepth = LinearEyeDepth(_CameraDepthTexture.Sample(_LinearClampSampler, refractionUv), _ZBufferParams);

 // Distance from camera to current pixel, conveniently available in the clip-space position W component
 float waterSurfaceDepth = input.positionCS.w;
 float underwaterDepth = backgroundDepth - waterSurfaceDepth;

 // If we've sampled an above-water pixel, ignore it and just sample without offsetting the UV
 if (underwaterDepth < 0)
 {
     refractionUv = screenPos;
     float nonDistortedDepth = LinearEyeDepth(_CameraDepthTexture.Sample(_LinearClampSampler, refractionUv), _ZBufferParams);
     underwaterDepth = max(0, nonDistortedDepth - waterSurfaceDepth);
 }

 // Sample camera texture with UV, which may or may not be offset, depending on above if-statement
 float3 background = _CameraOpaqueTexture.Sample(_LinearClampSampler, refractionUv).rgb;
 We’re almost done, however there is one more important visual element that you’ll often want to incorporate, which is foam. My ocean system outputs a foam-map, which is derived from the displacements of the geometry. Additional foam is also calculated from the shore waves, using a sawtooth function that lines up with the gerstner waves. The foam is then modulated by a tiling foam texture for detail.
To incorporate foam into our model, we can simply replace the Albedo color with a foam texture, and replace the Alpha with the foam texture’s opacity multiplied by the overall foam strength. As we are handling blending manually, we must also take the foam opacity into account when combining the water and underwater colors. The Roughness of the water can also be increased in foamy areas.
// Sample foam texture, modulate with foam strength determined from displacement/shore waves
float4 foam = _FoamTexture.Sample(_LinearRepeatSampler, foamUv);
float foamFactor = foamStrength * foam.a;

// Use foam color as the albedo and alpha. Modify smoothness based on foam coverage
 surface.Albedo = foam.rgb;
 surface.Smoothness = lerp(1, _FoamSmoothness, foamFactor);
 surface.Alpha = foamFactor;

 // Apply lighting. (GGX Specular only, diffuse will be ignored as Albedo is 0)
 float3 color = ApplyLighting(surface, input.positionWS);

 // Underwater scattering,
 // Get ambient lighting at this position, using world-up as the normal
 float3 ambient = AmbientLight(float3(0, 1, 0), input.positionWS);
 float3 scattering = _Color * (ambient + light.Color * light.Direction.y);

 // Attenuate underwater color based on foam coverage
 color += scattering * (1 - foamFactor);

 // Combine with the tinted underwater surface based on foam coverage
 color += background * (1 - foamFactor);
 color = ApplyEffects(color, input.positionWS);
 return float4(color, 1);
The final result combines multiple visual elements of water in a physically-plausible way, ensuring it will look consistent under different lighting conditions. The input parameters are also simple, making it easy to control or modify for different looks or styles.
The shader and screenshots are made with Unity and a custom rendering pipeline, however the techniques should be applicable to any engine or rendering pipeline, including node-based editors.
Good luck with your water shaders!